Chase's Ikea Play Kitchen Hack

Merry Christmas everyone! We are so blessed to be celebrating with our family and friends so plentifully this season. This has been an incredible year of blessings, albeit tons of ups and downs with Clement’s health, our recent loss, a ton of change in our career and workloads. The biggest thing has been Clement’s health. While it hasn’t been easy, the past few months have shown us better days, and we are so grateful to God for all of that. In fact, it’s only because he’s been feeling better that we’ve been able to travel so much - a total of 5 trips with Chase (Maui, Edmonton, Seattle, LA, Whistler) in the last six months. God is so, so good. Chase is now 17.5 months old, super active and interactive and learning so many words these days, it’s been so fun watching him grow up. Things that interest him today, or things that he learns or picks up - it’s such a blessing! We’re learning so much about his personality and his character every day.
Chase’s Ikea Play Kitchen project came about as we’ve been noticing how much he’s been loving “helping” us out when we cook / prep his food or snacks, and how much he’s been enjoying the kitchens at playgrounds or other people’s houses, or even whenever we visit Ikea. I also have been following Montessori In Motion’s blog/IG and I’ve been so inspired to incorporate some of the practices to our home. We struggled a bit whether or not to make a play kitchen or a real functional kitchen for Chase, so there’s a bit of both in his kitchen. It’s also been a while since C & I have done a craft project like this together, and after our recent loss I wanted to do something to pour my heart and soul into, as a little bit of a healing project / distraction since I really do find solace in creating something with my own hands.

Materials
Spray Paint (We used Rustoelum White, Satin Hunt Club Green, Champagne Mist)
Foam Board + Self-Adhesive Subway Tiles
Polyurethane Spray for Sealing
Painter’s Tape
Instructions
Labeling the parts - I used Photoshop to help me visualize what I wanted the end result to look, so I knew which parts needed to be in what color. So I opened up the Ikea box and labeled everything with painter’s tape what color they needed to be, and also taped up the sections that didn’t need to be painted.
Spray painting the parts - C took over this part of the project, and did it in our garage, so that the parts can air-dry. Once he did a couple of coats, he spray painted the polyurethane on for sealing. Note: Spray painting the Ikea parts won’t be perfect, the surface isn’t porous enough to take the paint so there will be imperfections and might chip eventually.
Assembly - C just followed the instructions except for the handles, as we used the Ikea leather handles instead of the ones they came with.
Backsplash - Our neighbor Flo told us to put a backing else things will keep falling through, so we did! We used adhesive tiles (they’re like foam stickers) to achieve this look, and C stapled this onto the back of the kitchen.
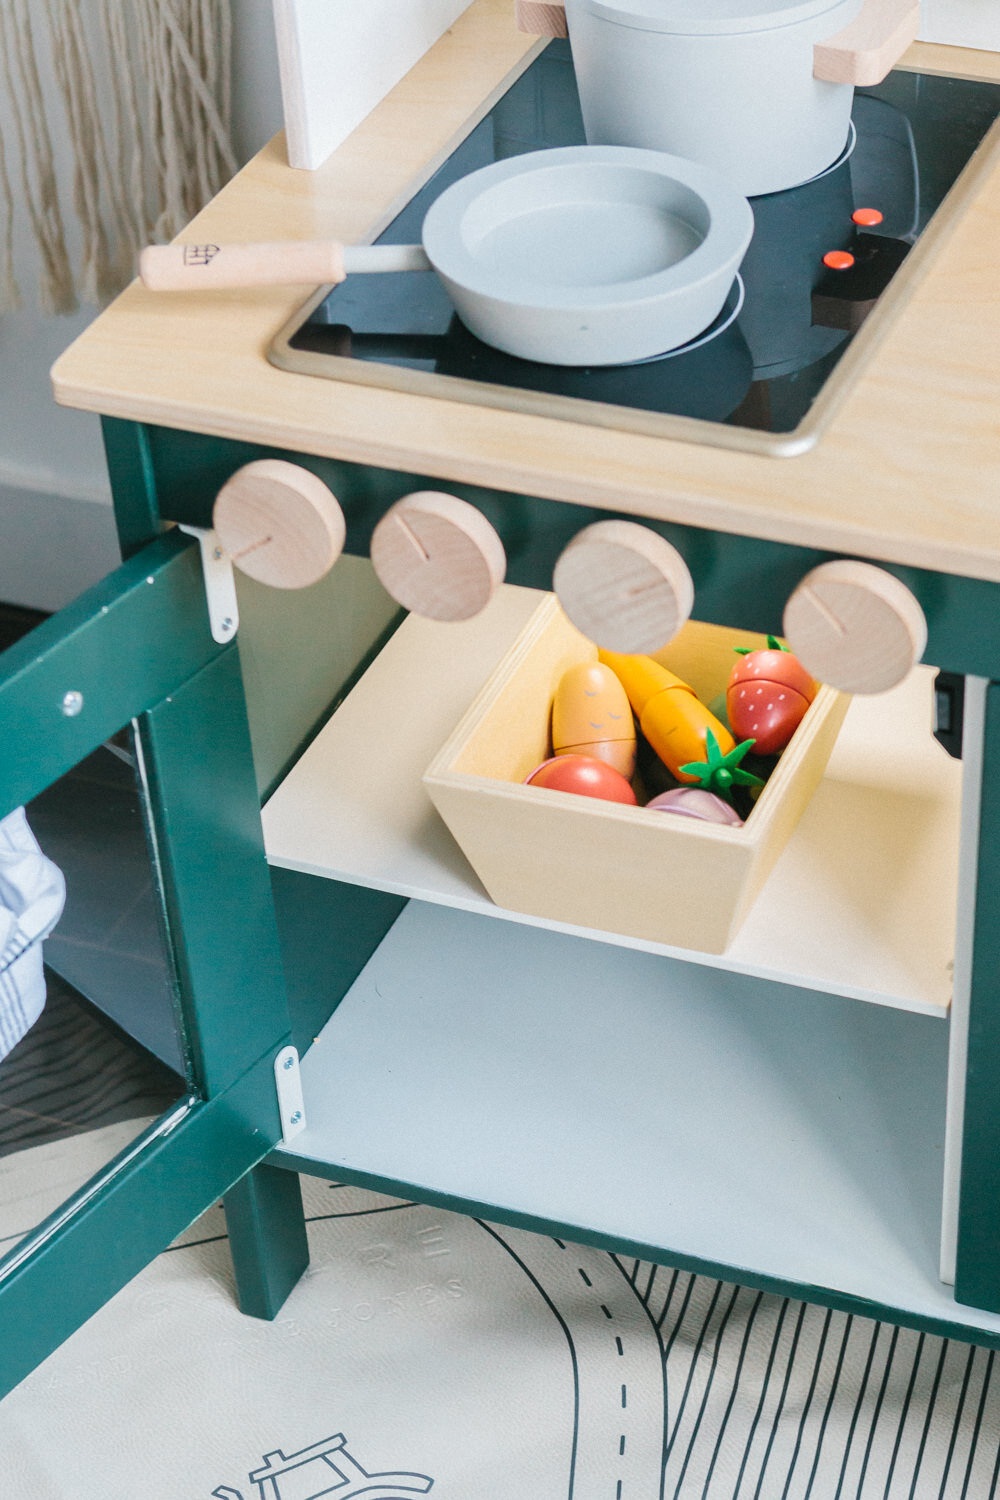
Knobs - I know we have more tools than the everyday person, like - I have an engraver. So I used the engraver to draw a line on the wooden knobs to make it seem like it would turn, and we drilled holes into the portion above the oven and put it in.
Motion sensor lights - We put this in the microwave and in the oven, but we realized that motion sensor lights actually work when it’s dark, but it’s not dark where our kitchen is so this works sometimes and sometimes not.
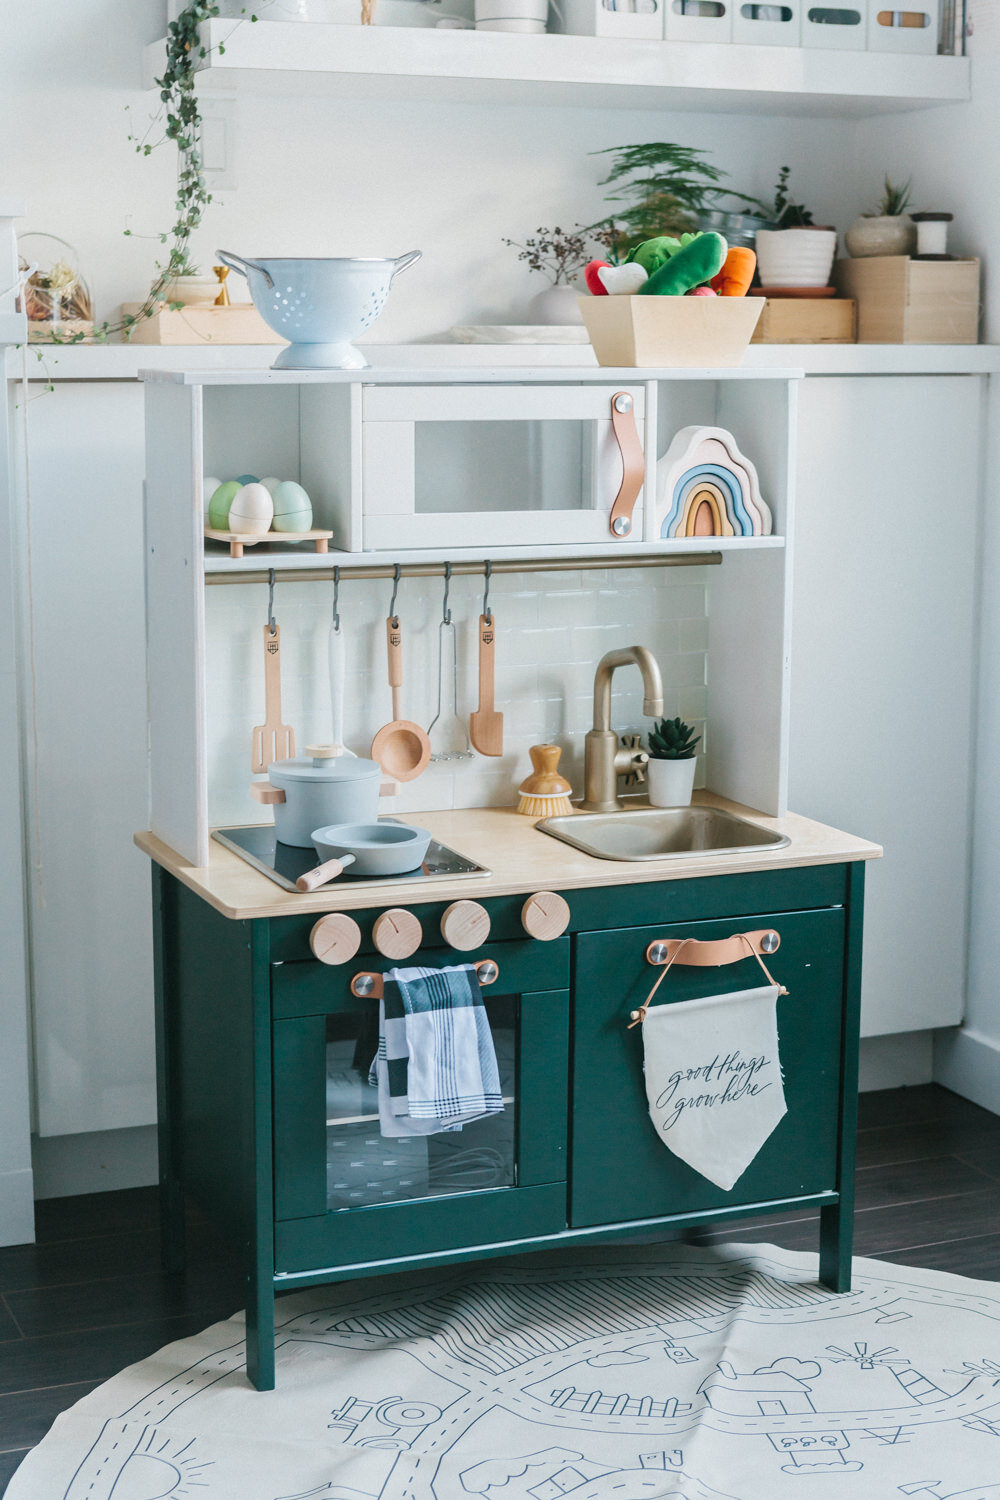
Styling! We got these pots and pans from the Hearth and Hand by Magnolia from Target and we love it. It came with the cutest mini towels, and a matching food set, too. We also got a whole bunch of mini tools from Home Sense that actually work - so we actually use some of these items whenever Chase helps out in the kitchen.

Loved the pots and pans set from Target, and also the food set! It came with the cutest egg container with the most perfect colors.

Love this functional knife - we’ve been teaching Chase how to cut fruits lately and helping him develop his knife skills, so we’re glad this is not just for play.

This is a real brush for washing dishes. Chase has been learning to wash his own plates lately. He’s perfected dropping his finished plate off to the sink, the scrubbing - not so much yet!

One of Chase’s favourite things to do has been washing his own fruit in the colander (I know, it’s so cute!). He can’t control eating the fruit while we’re just washing them for cutting. Haha! We got this one from Home Sense.
The idea of the motion sensor light was so good but the actual execution is okay only. I am on the search for the right motion sensor light, and hopefully that will work better!

This is Chase’s doing. The microwave section was empty, so he put in all his baking supplies in there. These are all real tools, not toys! He loves baking with me, so these are his little hand friendly tools.

Really love how the backsplash turned out! The Target set also turned out great and we could hang it on the hooks. Although at this time, Chase is still having a hard time taking the utensils out of the hooks. That mini potato masher tho! So cute.

This is his broom and dust pan. He’s absolutely terrible at using it still, hahaha, but we’re off to a good start. After every meal, he would pick it up and try to sweep it like a vacuum, and then put it back onto the hook. LOLs!

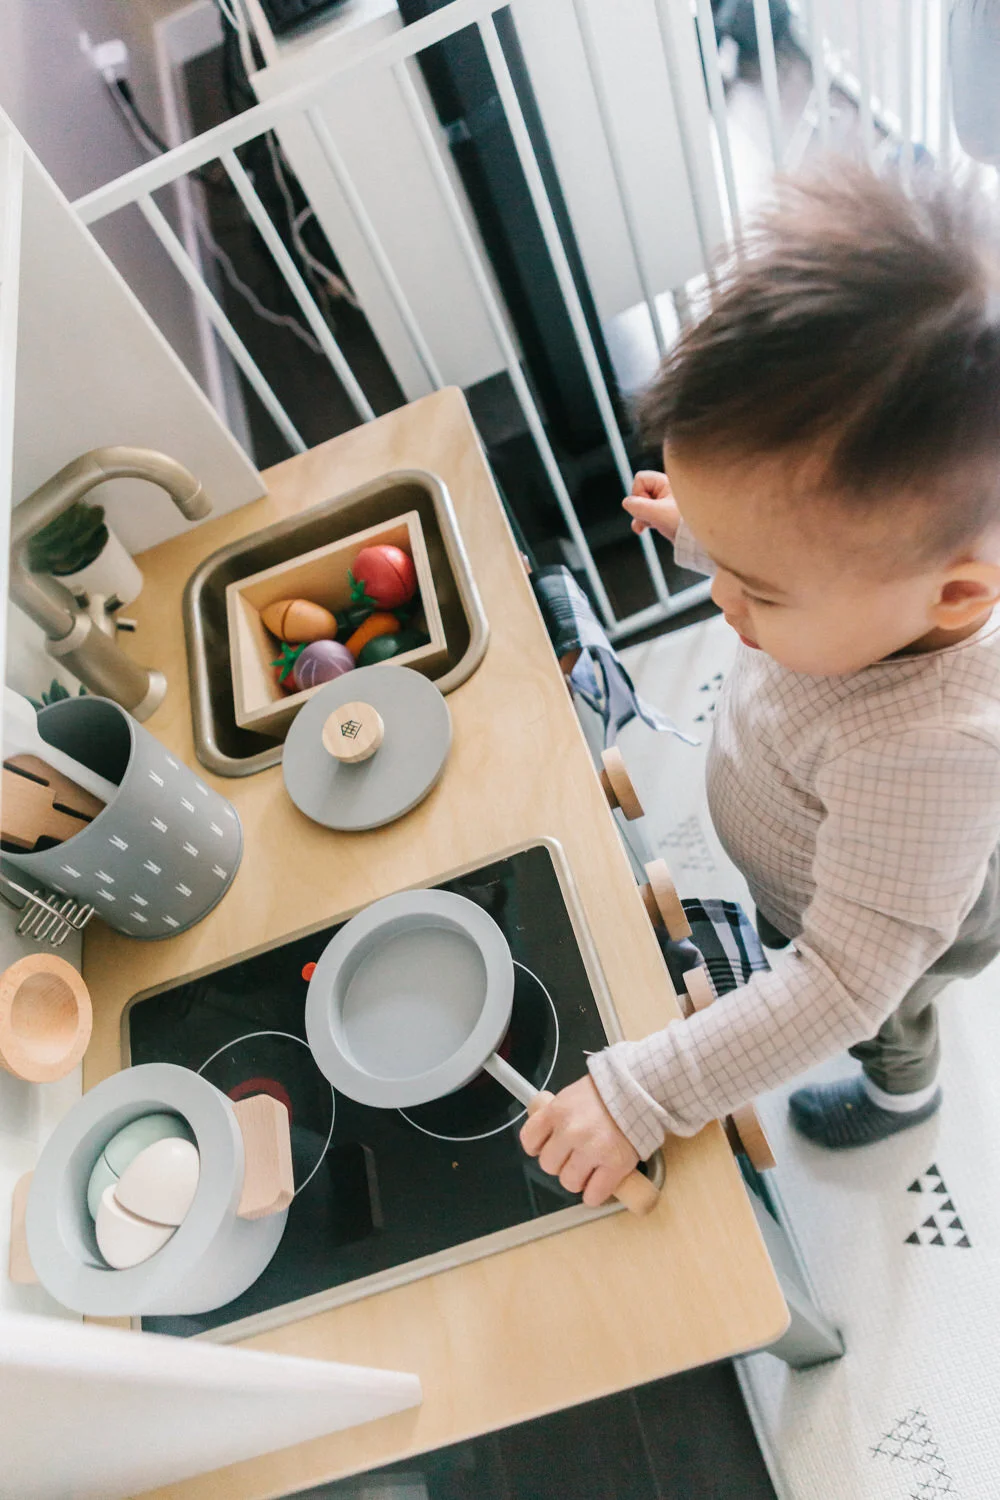
I have a love-hate relationship with the sink. Should I super glue it down? I probably should. Seriously, he just keeps removing it and also putting it over his head like this.

Nothing beats seeing his happy face playing in the little kitchen though. And that little toaster - we got it from our last trip to Anko in Seattle!
Our reveal was quite simple. We had started our morning with a delicious breakfast cooked by C, then we read the Nativity story together as a family and then we opened gifts together. We had covered up the kitchen in Ikea wrapping paper (of course) and when Chase saw a peek, he didn’t realize it was a kitchen, so he said "Bye!” to it, hahaha! Then we unveiled it and he had the biggest smile on his face. Mission accomplished!
Love,
K